In this and the next posts we will build an application using Statecharts with the help of the Xstate library. The posts will be broken into 2 parts:
- The post you are reading will cover how to model your application using Statecharts and Xstate/Viz where we'll cover some of the main concepts of Statecharts.
- Writing your application with React and Xstate
Without further ado, let's get to today's post!
Before we start modeling an application, we need to understand a bit more about some of the Statecharts concepts. It's also worth remembering that all examples will be using Xstate, but you don't need any library to start using it today. During the development of the model, we'll cover the following concepts:
- context
- state
- invoke
- actions
- guards
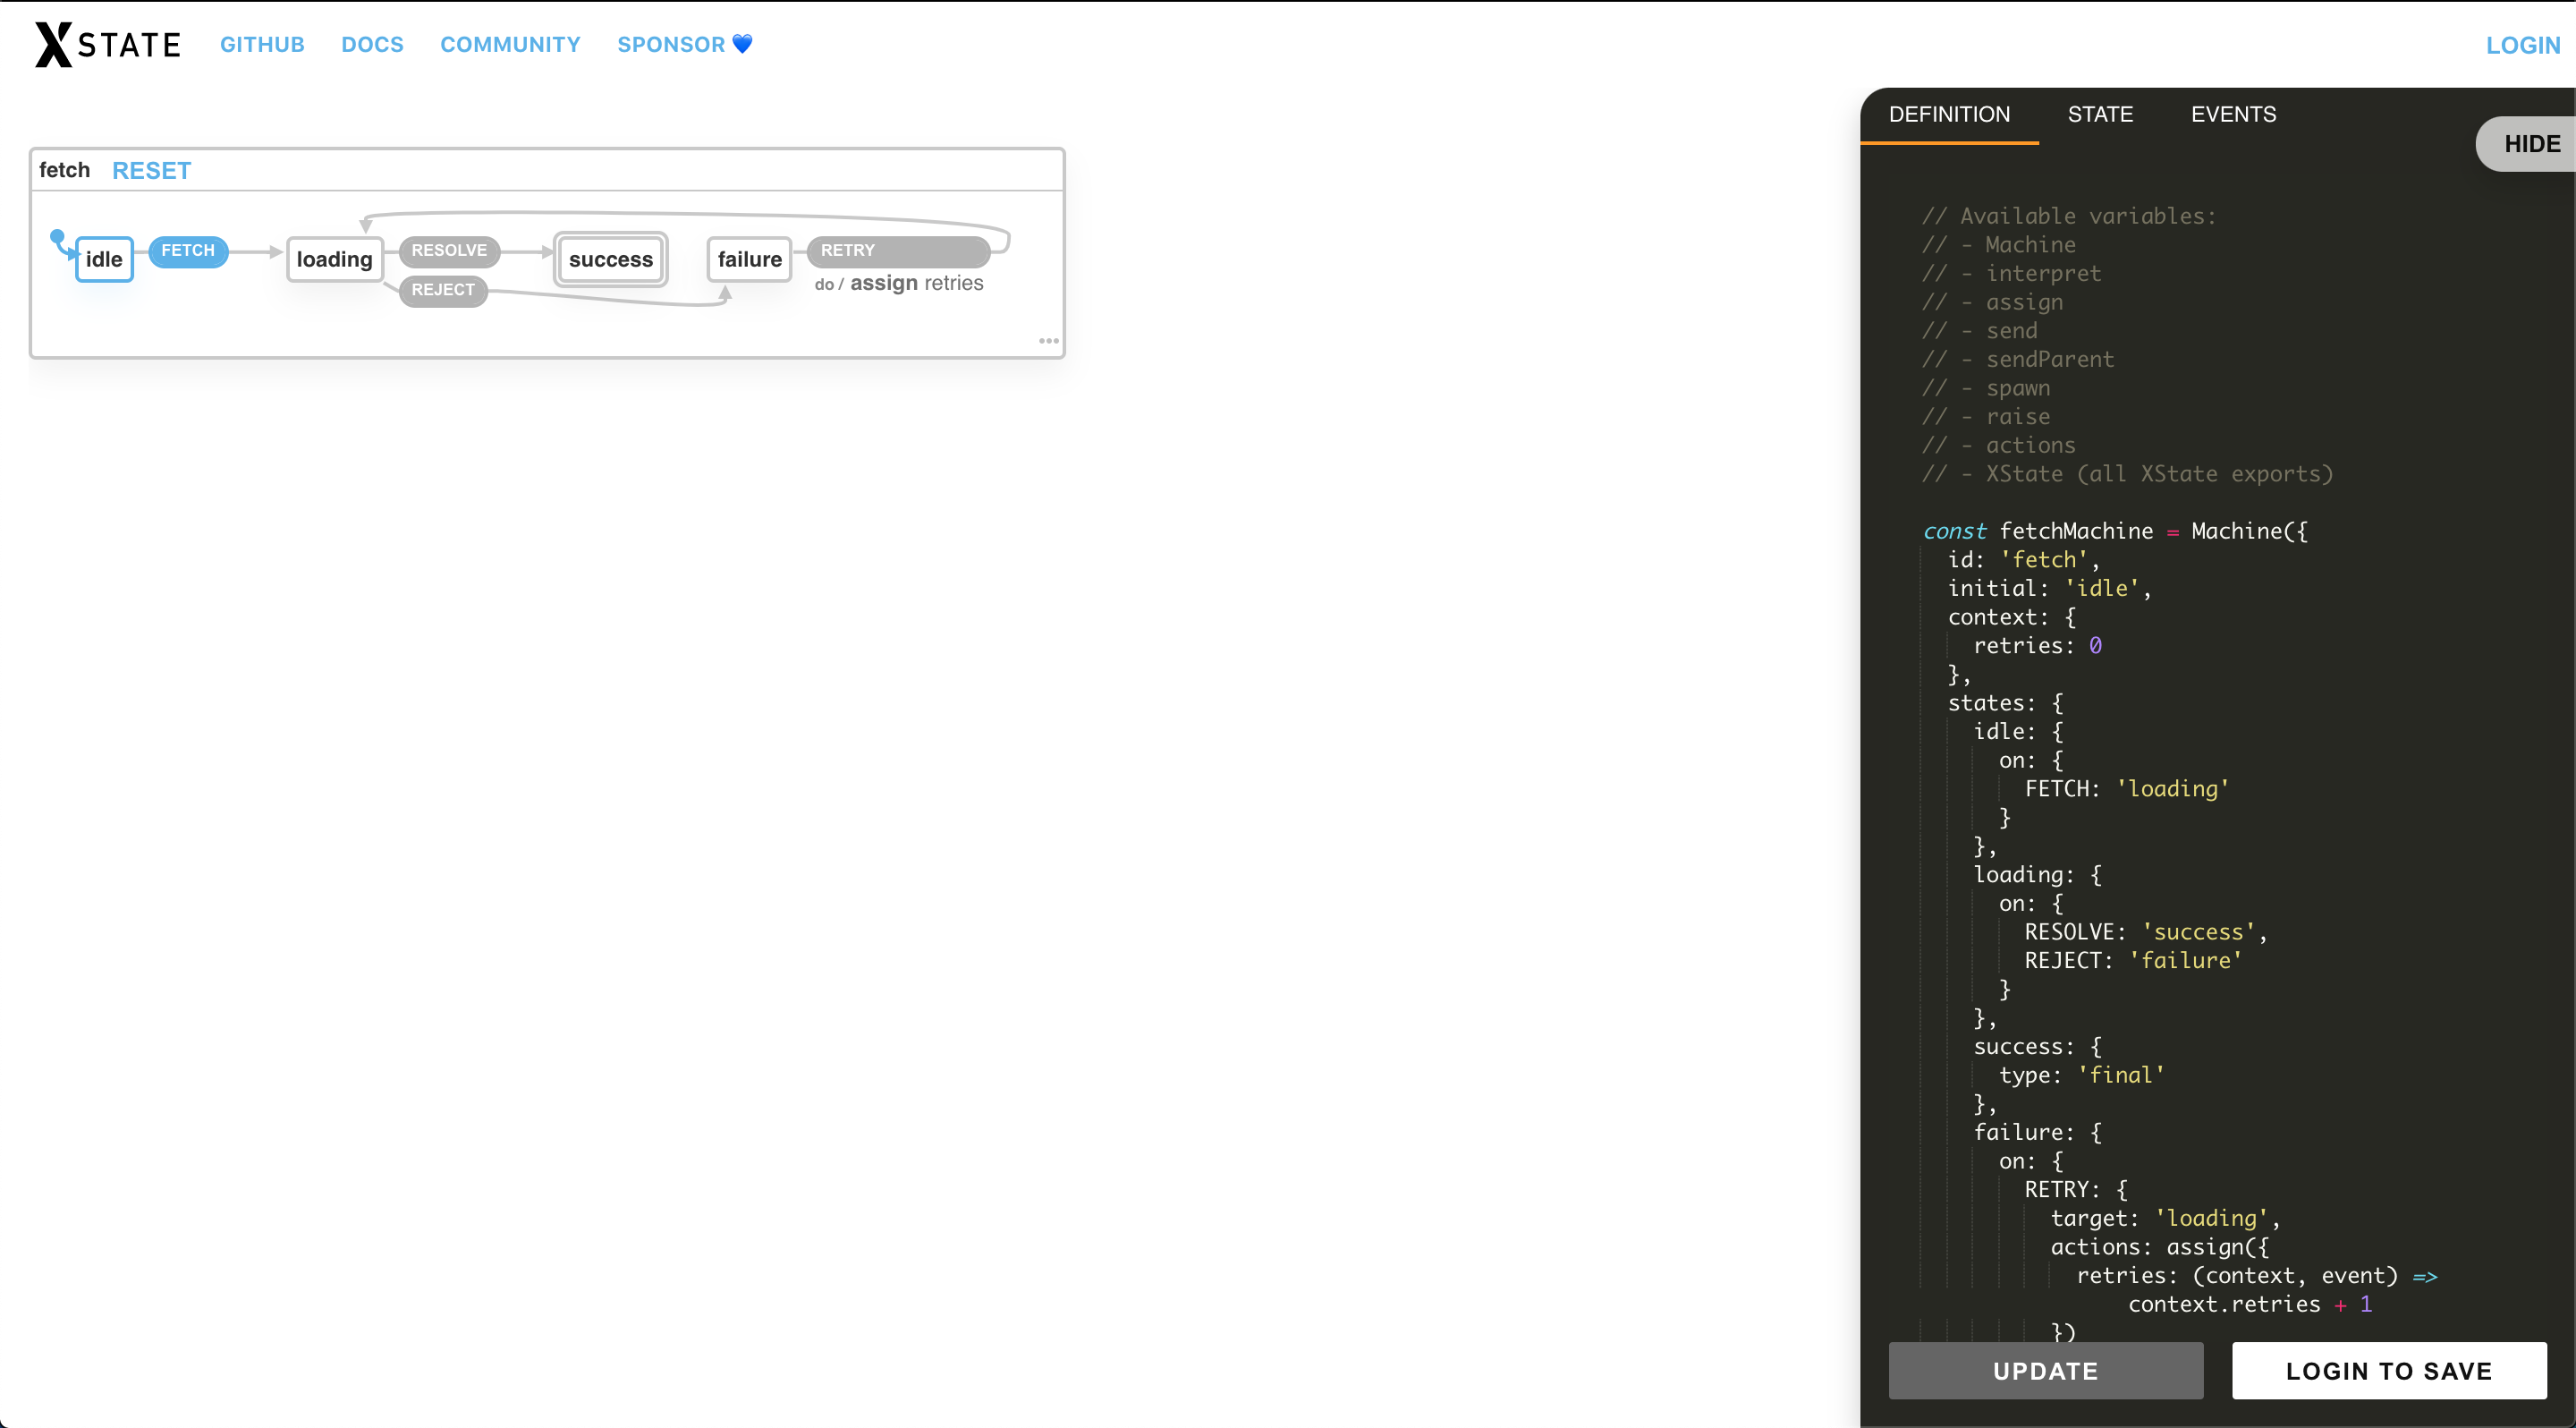
One of the coolest features of Xstate is being able to visualize your code. Today we'll use xstate/viz which will help us create our model. First of all, open the following link: xstate/viz, you'll probably see a page like the image below, it will start with a fetch machine and with the example code on the right side.
The first thing we'll do is update the code in Xstate/Viz to the code below and click update:
const catsApp = Machine({
id: 'catsApp',
initial: 'idle',
states: {
idle: {}
}
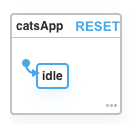
});The code above is the basic code to start a new State Machine. Each state machine receives a unique id, an initial state, and of course, the list of available states. The result will be:
The first thing to do is think about which states our application can have. In this example, we'll create an application that, when clicking a button, fetches an image of a kitten from an API. The application will also handle API errors, allowing the user to retry up to 3 consecutive times if the API returns errors.
With this brief description, we can then say that our application will have the following states:
- idle
- loading
- success
- error
- cant_retry
The result in code would look like this:
const catsApp = Machine({
    id: 'catsApp',
    initial: 'idle',
    states: {
      idle: {},
      loading: {},
      success: {},
      error: {},
      cant_retry: {}
    }
  });
And the result in xstate/viz:
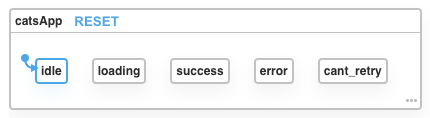
Don't worry if you forget some state the first time. Little by little and with practice, you'll get the hang of it and be more accurate in which states your application or component should have. Changing it if needed is simpler than it seems, you can use xstate/viz to help you visualize the changes and test all possible flows.
Remember our state transition diagram mentioned in the first post of this series, where we showed that starting in state A ⇒ an event X happened ⇒ we go to state B? The next step is to define which events within your system force a state transition. For example, when we're in the initial state (idle) we can say that the event LOAD_NEW_PICTURE forces a transition to the loading state, meaning:
- idle ⇒ LOAD_NEW_PICTURE ⇒ loading
- loading ⇒ ON_DONE ⇒ success
- loading ⇒ ON_ERROR ⇒ error
- success ⇒ LOAD_NEW_PICTURE ⇒ loading
- error ⇒ RETRY ⇒ loading
In code it would be:
const catsApp = Machine({
    id: 'catsApp',
    initial: 'idle',
    states: {
      idle: {
        on: {
          LOAD_NEW_PICTURE: 'loading'
        }
      },
      loading: {
        on: {
          ON_DONE: 'success',
          ON_ERROR: 'error'
        }
      },
      success: {
        on: {
          LOAD_NEW_PICTURE: 'loading'
        }
      },
      error: {
        on: {
          RETRY: 'loading'
        }
      },
      cant_retry: {}
    }
  });
and in xstate/viz:

Visualizing your code is very interesting. In the example above, we can clearly see which event takes the application to another state and all possible flows. And even holes in the system - see how the cant_retry state will never happen because no event forces a transition to it 🤷♂️ but don't worry, we'll get there.
Context
Context is a feature of the Xstate library that allows you to save dynamic contexts depending on the state your application is in. Context in this case is our famous state as we're used to using with other libraries like Redux, Mobx, Context API in the case of using React, or even a simple component state.
In this case, our context will be our current photo to be displayed and the number of times the user has tried to fetch a new photo in case of errors. We need to start our machine with the initial context, so the code would look like this:
const catsApp = Machine({
id: 'catsApp',
initial: 'idle',
context: {
currentImageUrl: '',
retryTimes: 0
},
states: {
idle: {
on: {
LOAD_NEW_PICTURE: 'loading'
}
},
loading: {
on: {
ON_DONE: 'success',
ON_ERROR: 'error'
}
},
success: {
on: {
LOAD_NEW_PICTURE: 'loading'
}
},
error: {
on: {
RETRY: 'loading'
}
},
cant_retry: {}
}
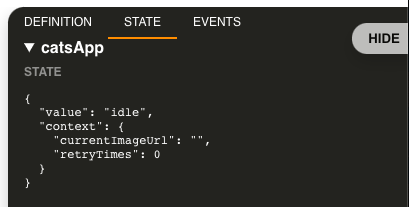
});Notice that in this case, we don't have any changes to the application states. But in xstate/viz if you open the tab called State you can see that it shows you the current state of the application and what the context values are at that moment.
Working with asynchronous actions
In any application, we'll always have actions that are asynchronous and the results of these actions may or may not result in a state transition. Using Xstate we call this Services, and calling a service is as easy and declarative as any other concept.
In our example, the service will be a promise that will make the request to fetch a new photo. The result of this promise, whether successful or error, will generate state transitions. Thinking about a data flow when the application goes from the idle state to loading, that's the moment we should make our request. Pay close attention to the loading state in the next example:
const catsApp = Machine({
    id: 'catsApp',
    initial: 'idle',
	  context: {
	    currentImageUrl: undefined,
      retryTimes: 0
    },
    states: {
      idle: {
        on: {
          LOAD_NEW_PICTURE: 'loading'
        }
      },
      loading: {
        invoke: {
	        src: 'fetchNewPicture',
          onDone: 'success',
          onError: 'error'
        }
      },
      success: {
        on: {
          LOAD_NEW_PICTURE: 'loading'
        }
      },
      error: {
        on: {
          RETRY: 'loading'
        }
      },
      cant_retry: {}
    }
  }, {
   services: {
     fetchNewPicture: () => fetch('')
   }
  });
We replaced our events with a key called invoke, which receives in this example 3 configurations:
-
src: It's a function that returns a promise. In our code we're just passing the name of the function that will be called, and as a second parameter to the Machine function, we pass an object with the services key which is nothing more than another object with all the services that can be called.
-
onDone: Which next state we'll redirect our machine to if everything goes well.
-
onError: Which next state we'll redirect our machine to if an error occurs.
It's worth remembering that a service can be a promise, observables, callback, or another machine.
The visualization of our code would look like this:

You can see that the viz puts invoke / service name inside the square that represents the current state and also the service name inside parentheses in the events symbolizing that that event is related to the called service.
Actions
Actions are fire-and-forget type functions, meaning functions that don't generate a state transition. Actions, however, are widely used to run any type of side effect that can update our context.
In our example, when the promise that fetches a new photo returns, we need to call an action to update the value of our currentImageUrl context.
Any state transition within Xstate can receive just a string with the name of the new state or a configuration object, where we pass the target that represents the next state and other configurations like, for example, an action. In this case, we'll change our invoke object to:
invoke: {
  src: 'fetchNewPicture',
  onDone: {
    target: 'success',
    actions: ['setCurrentImageUrl']
  },
  onError: 'error'
}
Notice that we only pass a string that is a reference to an action function. We'll also pass the action in the second parameter of the Machine function. This way, I believe it's simpler to read our machine. The final code would look like this:
const catsApp = Machine({
    id: 'catsApp',
    initial: 'idle',
	  context: {
	    currentImageUrl: undefined,
      retryTimes: 0
    },
    states: {
      idle: {
        on: {
          LOAD_NEW_PICTURE: 'loading'
        }
      },
      loading: {
        invoke: {
	        src: 'fetchNewPicture',
          onDone: {
				    target: 'success',
				    actions: ['setCurrentImageUrl']
				  },
          onError: 'error'
        }
      },
      success: {
        on: {
          LOAD_NEW_PICTURE: 'loading'
        }
      },
      error: {
        on: {
          RETRY: 'loading'
        }
      },
      cant_retry: {}
    }
  }, {
   services: {
     fetchNewPicture: () => fetch('')
   },
   actions: {
     setCurrentImageUrl: (context, event) => ({
       currentImageUrl: event.data.imageUrl
     })
   }
  });
An action receives as parameters the current context and an event. This event is nothing more than the return of the service. Since our service in this case is a promise, our event will be its return. If our service were a callback for example, this event would be the callback call with any additional information that the service wants to pass to the action.
The code visualization would look like this:

Notice that the Viz puts a list of actions that happen when an event is fired with do / action name right below the visual representation of an event.
Following our example, whenever the promise returns an error and the user sends the RETRY event, we should increment the retryTimes value in our context. We should also reset this value if the promise returns successfully. In this case, we'll add an action when we call the RETRY event and another when the promise returns successfully:
const catsApp = Machine({
    id: 'catsApp',
    initial: 'idle',
	  context: {
	    currentImageUrl: undefined,
      retryTimes: 0
    },
    states: {
      idle: {
        on: {
          LOAD_NEW_PICTURE: 'loading'
        }
      },
      loading: {
        invoke: {
	        src: 'fetchNewPicture',
          onDone: {
				    target: 'success',
				    actions: ['setCurrentImageUrl', 'resetRetryTimes']
				  },
          onError: 'error'
        }
      },
      success: {
        on: {
          LOAD_NEW_PICTURE: 'loading'
        }
      },
      error: {
        on: {
          RETRY: {
            target: 'loading'
            actions: ['incrementRetryTimes']
          }
        }
      },
      cant_retry: {}
    }
  }, {
   services: {
     fetchNewPicture: () => fetch('')
   },
   actions: {
     setCurrentImageUrl: (context, event) => ({
       currentImageUrl: event.data.imageUrl
     }),
     resetRetryTimes: () => ({ retryTimes: 0 }),
     incrementRetryTimes: (context) => ({
       retryTimes:  context.retryTimes + 1
     })
   }
  });
The code visualization would look like this:

Now you know how to recognize when an action is called just by looking at the code visualization 🚀.
Guards
Guards are used to ensure that a state transition that depends on some business rule is done safely. Using our example, when the promise that fetches a new photo returns an error, the user can try to fetch again up to 3 times. After trying 3 times without success, the user is then redirected to a state where they can no longer try to fetch a new photo.
To make this happen we'll use guards. The way to configure a guard is quite simple. In our case, the RETRY event will contain two possible branches:
  error: {
      on: {
        RETRY: [
        {
          target: 'loading',
          actions: ['incrementRetryTimes']
        },
        {
          target: 'cant_retry'
        }
       ]
      }
    }
In this case, nothing happens because we haven't added our guard yet. To add one or more guards, just put a cond key in the branch that should only be redirected if the guard returns true. Branches are always read in the order they were declared, meaning in this case we'll put our guard in the first branch. If the guard return is false, we'll then go to the next option which will force a state transition to the cant_retry state. Our code would look like this:
  error: {
      on: {
        RETRY: [
        {
          target: 'loading',
          actions: ['incrementRetryTimes'],
          cond: 'canRetry'
        },
        {
          target: 'cant_retry'
        }
       ]
      }
    },
Again we use the string to reference the guard function name that will be in the second parameter of the Machine method. The final code would look like this:
const catsApp = Machine({
    id: 'catsApp',
    initial: 'idle',
	  context: {
	    currentImageUrl: undefined,
      retryTimes: 0
    },
    states: {
      idle: {
        on: {
          LOAD_NEW_PICTURE: 'loading'
        }
      },
      loading: {
        invoke: {
	        src: 'fetchNewPicture',
          onDone: {
				    target: 'success',
				    actions: ['setCurrentImageUrl', 'resetRetryTimes']
				  },
          onError: 'error'
        }
      },
      success: {
        on: {
          LOAD_NEW_PICTURE: 'loading'
        }
      },
      error: {
        on: {
         RETRY: [
	        {
	          target: 'loading',
	          actions: ['incrementRetryTimes'],
	          cond: 'canRetry'
	        },
	        {
	          target: 'cant_retry'
	        }
	       ]
        }
      },
      cant_retry: {}
    }
  }, {
   services: {
     fetchNewPicture: () => fetch('')
   },
   actions: {
     setCurrentImageUrl: (context, event) => ({
       currentImageUrl: event.data.imageUrl
     }),
     resetRetryTimes: () => ({ retryTimes: 0 }),
     incrementRetryTimes: (context) => ({
       retryTimes:  context.retryTimes + 1
     })
   },
   guards: {
     canRetry: (context) => context.retryTimes <= 3
   }
  });
Notice that now our cant_retry state has a connection with the Retry event, and we have two Retry events that represent in order the branches we declared. Notice also that the first branch within the event has an array of guards and the names of these conditions. A guard turns green if it returns true and red if it returns false, representing that that event won't happen.
Type final
Final type states represent that that machine is finished, meaning no event or transition will happen after the machine reaches this state. In our example, the cant_retry state is our final state. It's worth remembering that a machine doesn't necessarily need to have a final state.
const catsApp = Machine({
    id: 'catsApp',
    initial: 'idle',
	  context: {
	    currentImageUrl: '',
      retryTimes: 0
    },
    states: {
      idle: {
        on: {
          LOAD_NEW_PICTURE: 'loading'
        }
      },
      loading: {
        invoke: {
	        src: 'fetchNewPicture',
          onDone: {
				    target: 'success',
				    actions: ['setCurrentImageUrl', 'resetRetryTimes']
				  },
          onError: 'error'
        }
      },
      success: {
        on: {
          LOAD_NEW_PICTURE: 'loading'
        }
      },
      error: {
        on: {
         RETRY: [
	        {
	          target: 'loading',
	          actions: ['incrementRetryTimes'],
	          cond: 'canRetry'
	        },
	        {
	          target: 'cant_retry'
	        }
	       ]
        }
      },
      cant_retry: {
        type: 'final'
      }
    }
  }, {
   services: {
     fetchNewPicture: () => fetch('')
   },
   actions: {
     setCurrentImageUrl: (context, event) => ({
       currentImageUrl: event.data.imageUrl
     }),
     resetRetryTimes: () => ({ retryTimes: 0 }),
     incrementRetryTimes: (context) => ({
       retryTimes:  context.retryTimes + 1
     })
   },
   guards: {
     canRetry: (context) => context.retryTimes <= 3
   }
  });
Modeling an application seems fun now, especially knowing that all the code we wrote in this task is the same code that will be used in the final application. In the next post, we'll actually use this code and create our front-end application using React and Xstate.
See you there!